
January 2019. California's Central Valley.
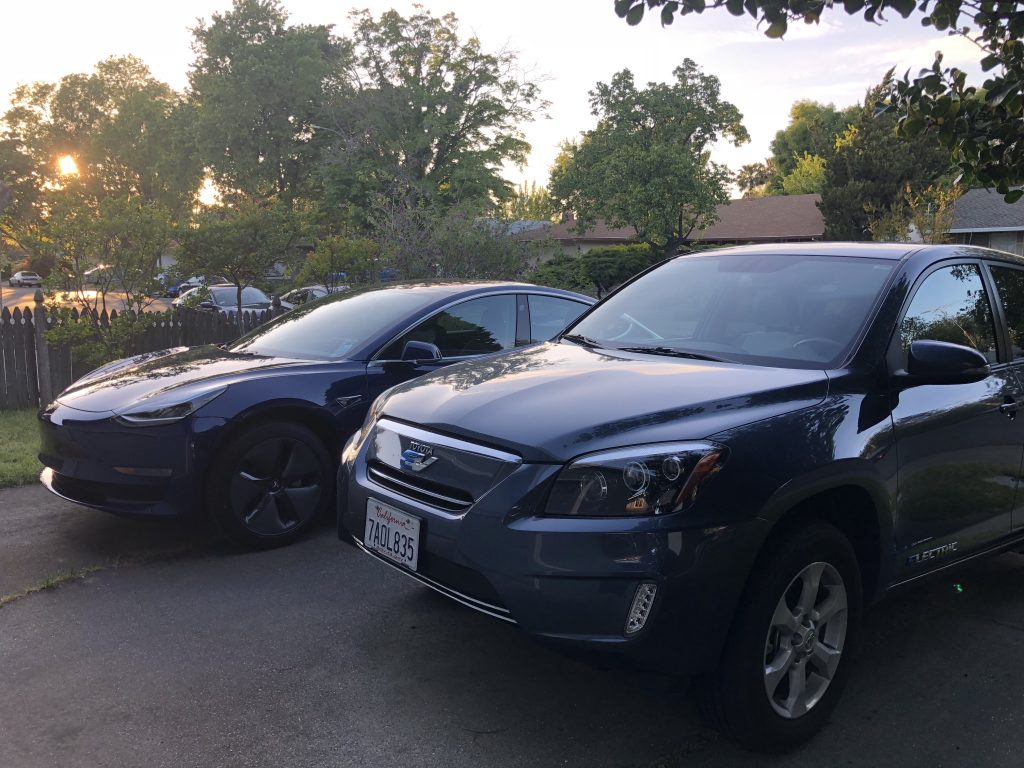
When we bought our home over a decade ago we set goals for ourselves: To make the electricity we use; and to drive electric cars powered by our solar power system. We’re not there yet, but we’ve made progress.
We now drive two electric cars and have a 6.2 kW solar power system on the roof of our house. On an annual basis the electricity produced by our solar system offsets most of the electricity we use, but doesn’t directly power our cars, yet.
System Specs:
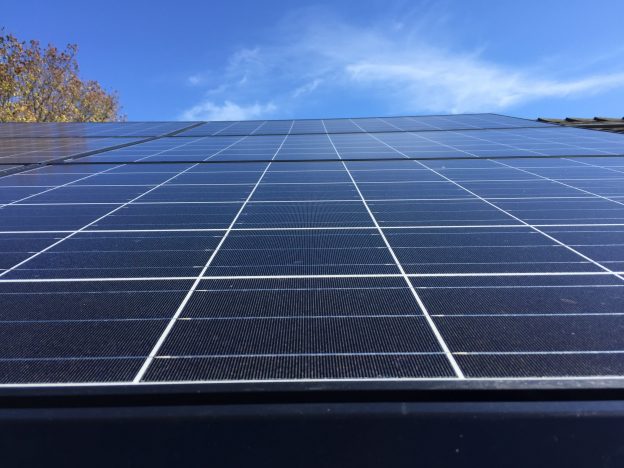
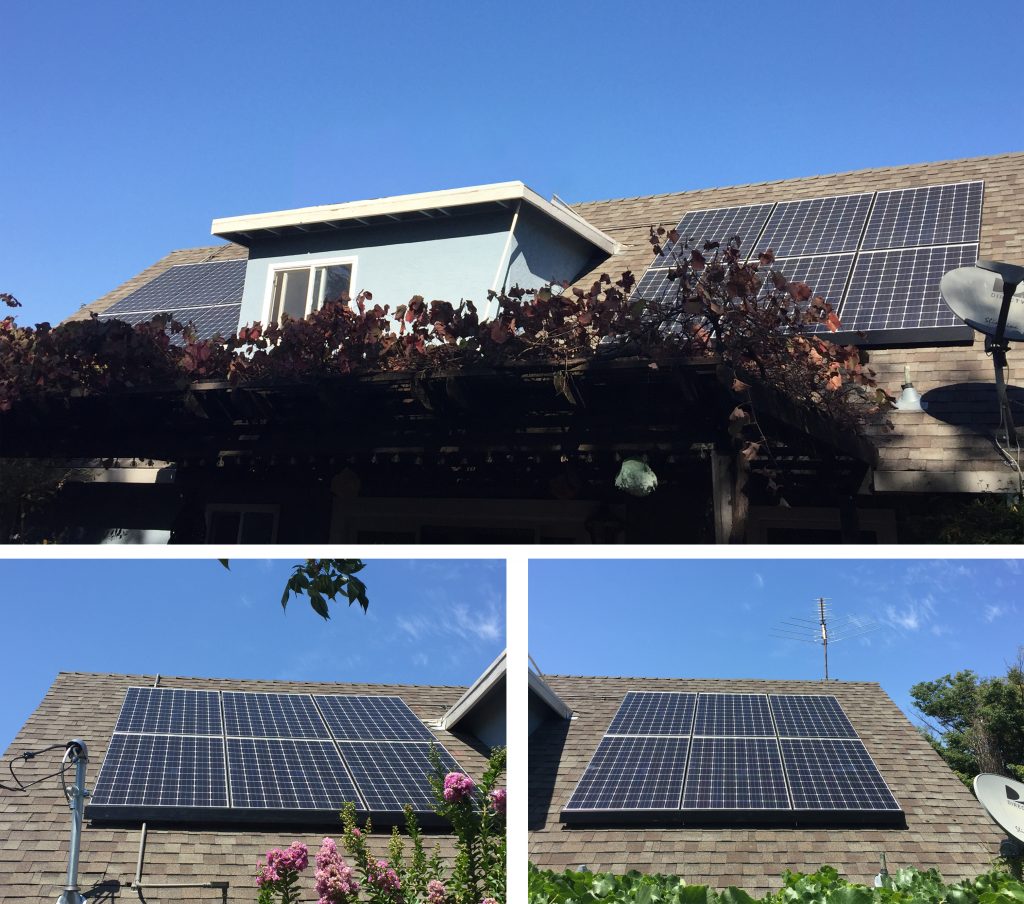
We built our solar power system in 2 stages. First, we had a 2.385 kW system installed on our west facing roof. The following year we had a 3.9 kW system installed on our south facing roof. The combined system is rated at 6.285 kW.
Note on the kW power rating of solar power systems: Our west-facing system is made from panels rated at 265 Watts each, and the south-facing system consists of panels rated at 325 Watts each. The rating of solar panels represents the maximum number of Watts that can be produced under ideal conditions. In the real world our 6.2 kW system has maxed out at ~5.2 kW under full summer sun.
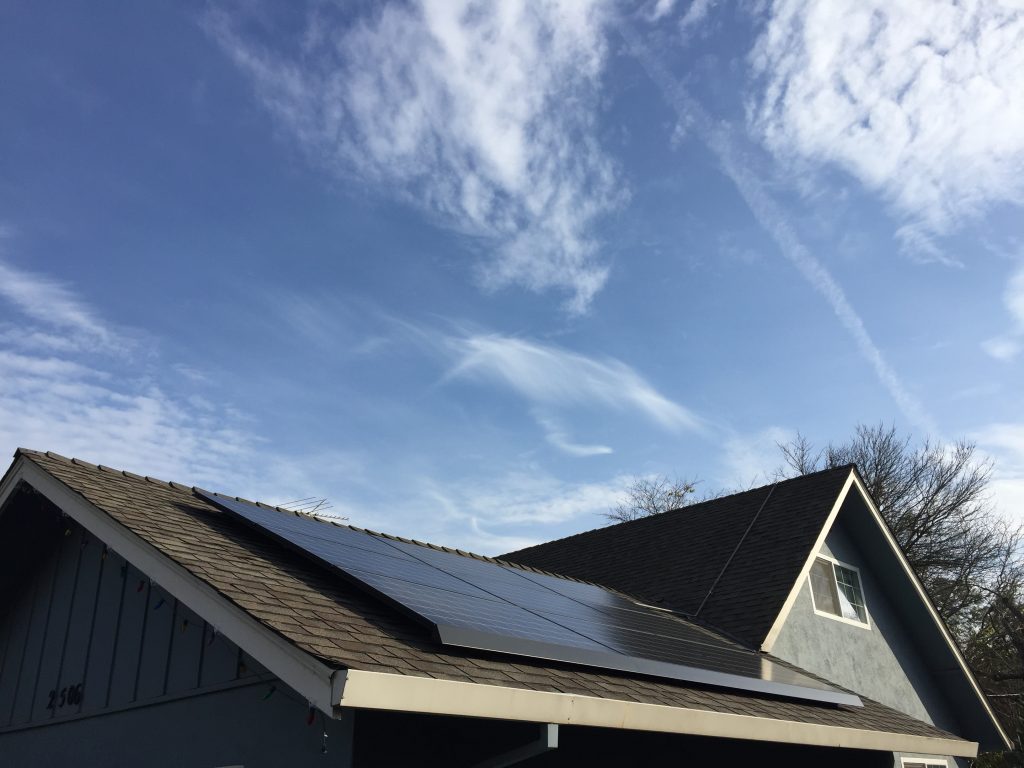
The west facing roof has nine panels set up as a single array. Our south facing roof has decent exposure, but is not ideal because a dormer window in the middle of the roof takes up valuable space. As a result we have two sets of six panels set up on either side of the dormer.
Comparison Shopping
We contacted five companies to get bids for our solar system. Four companies responded, and two sent reps to our house to look at the roof and surroundings. Only one company, SolarCity, got up on the roof to inspect the roof and shingles, and into the attic to ensure the rafters and plywood roofing were in good shape. We got 4 quotes and went with SolarCity. Their quote was in the middle in terms of total cost but we choose them for several reasons including the thorough inspection. YMMV.
Installation
The first step was upgrading the electrical service panel for our house. The original 100 amp panel was maxed out and did not have capacity to add the new circuit required for the solar system. Lucky for us our house had 200 amp service and an electrician came out to install a new 200 amp panel. As a big bonus, with the new panel we have the capacity to install a dedicated 50 amp circuit for charging our EVs. The cost of the panel upgrade was included in the price of the solar system.
On installation day the Solar City crew arrived early in the morning and got right to work. They set up a perimeter around the house and safety harnesses for each worker on the roof and began installing the panels.
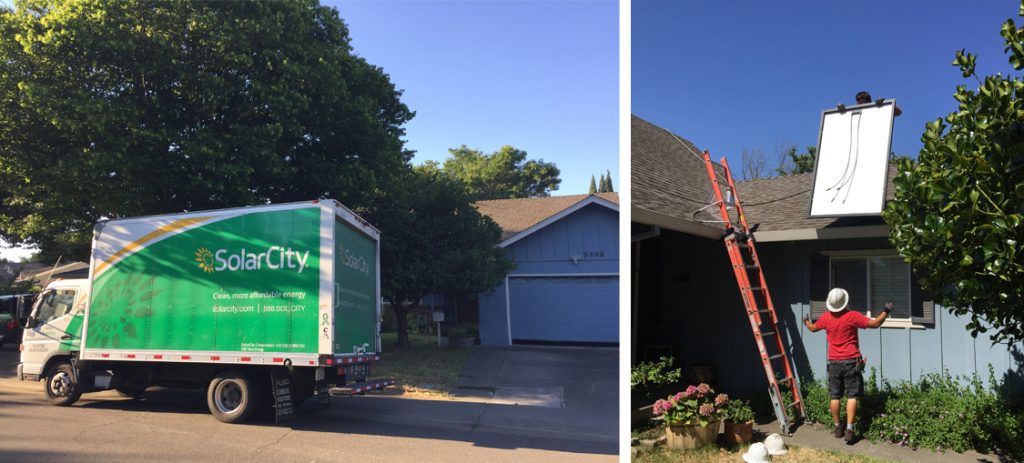
The crew worked quickly and in 4 hours we had solar panels installed on the roof. A separate crew worked to install the inverters, and connect the solar panels to the inverters and main service panel. The crew was friendly, quick, clean, and all went well.
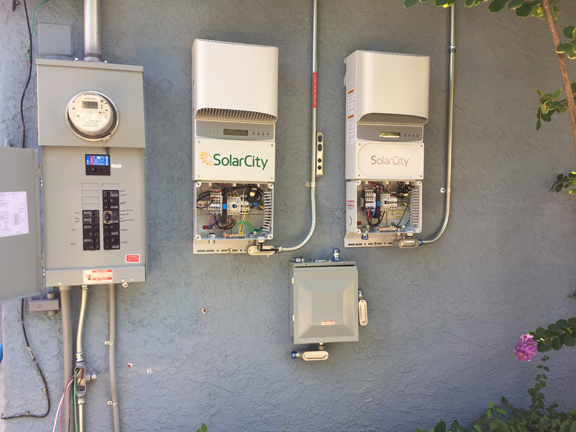
Inverters:
Solar panels produce direct current (DC) electricity that must be converted to alternating current (AC) so it can be used in your home or sent out onto the electrical grid. There are 2 basic types of inverters used by solar systems: micro inverters and string inverters. There are pros and cons for each type of inverter, but without getting into the details we choose to go with SolarCity’s string inverters.
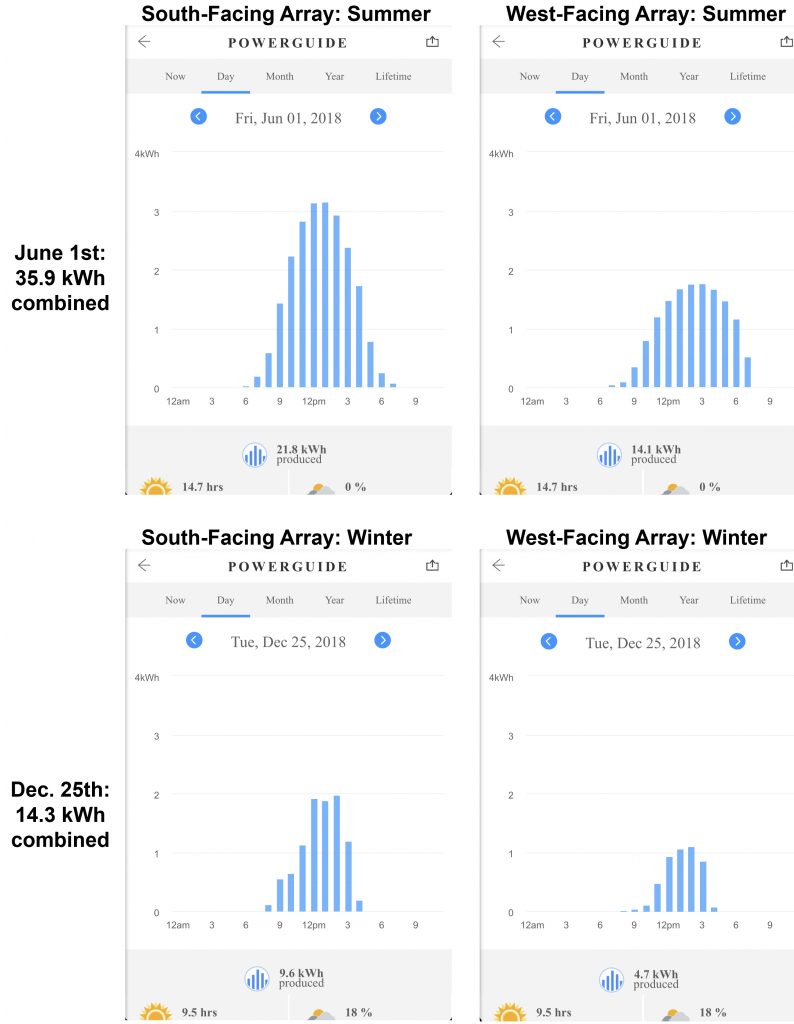
One string inverter is connected to the west-facing array, which does not experience shading problems. A second inverter accepts dual input to operate the two 6-panel arrays on the south-facing roof as independent systems. This is important because shade from the dormer window falls on one array in early morning hours, and on the other array in late afternoon hours. In this way the 6-panel array receiving full sunlight continues to produce electricity at full power. Micro-inverters on each solar panel would also solve the partial shading issues, but again we went with SolarCity and the ABB string inverters they use.
There are many websites that can help explain the differences in cost, efficiency, electricity production, and durability of string inverters vs. micro-inverters for those researching solar systems.
Making Electricity
The south-facing panels reach maximum power around mid-day and the west-facing system reaches peak power a couple hours later.
Our solar power system includes a production meter that allows us to monitor electricity production. As you would expect production varies over the year and we make twice as much electricity on summer days as we do in the winter. The image below compares production from the South-facing and West-facing arrays for one day in summer and one day in winter. The combined system made 35 kWh of electricity on June 1st, and 14 kWh on December 25th.
Cost
The total bill for the entire solar power system, before rebates, was $26,522. We received $7,956 in federal tax rebates (we received the tax rebate), and $1,875 cash from Solar City after the system was connected to the grid (this money was also received). Subtracting rebates from total cost we paid $16,691. We got a loan for the system and expect to have it paid off in 6 years. The cost of our solar system is similar to the cost for a new car. BUT after the system is paid off it will continue generating electricity, and will more than pay for itself as it helps to pay our utility bill for up to 20 years.
Breaking this down we paid $4.22 per Watt installed before rebates, and $2.66 per Watt after rebates.
Why We Installed Solar
We installed the solar power system for several reasons, but our main goal was to make what we use. Installing solar panels allows us to offset the electricity we use to power our home and electric cars. This significantly reduces the amount of pollution we make on a daily basis.
The follow up Solar Power Part 2 post reviews how much electricity we produced over the course of a full year, and how that covered the charging needs for our Model 3 as well as our home electricity use.